How to make a solar panel using simple materials at home
How to make a solar panel is a question many eco-conscious DIYers are exploring as the world shifts toward renewable energy. Whether you’re experimenting for educational purposes or setting up a basic system to power lights or charge batteries, building a solar panel at home is possible using affordable and accessible components.
While homemade solar panels won’t match the efficiency or lifespan of commercial models, they can still produce usable power and serve as excellent learning tools. In this article, we’ll walk you through a detailed, step-by-step guide to build a basic solar panel, discuss key materials, safety tips, potential outputs, and how to expand the system.
What is a solar panel and how does it work?
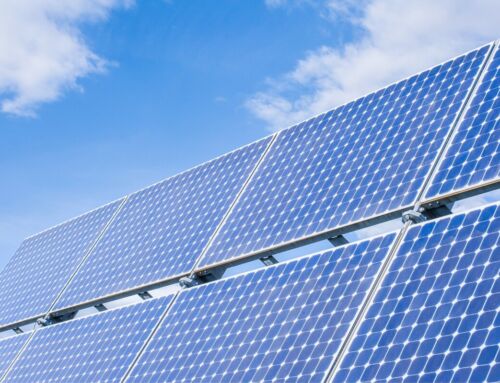
A solar panel is a device that captures sunlight and converts it into electricity using photovoltaic (PV) cells. These cells are made from semiconductor materials, usually silicon, that release electrons when exposed to light. This movement of electrons creates direct current (DC) electricity.
When you make a solar panel, you’re essentially wiring multiple PV cells together, protecting them with a transparent surface (like glass or acrylic), and housing them inside a durable frame. The result is a module that can generate electricity from the sun.
Tools and materials needed
To get started, gather the following materials:
| Item | Purpose |
|---|---|
| Solar cells (monocrystalline or polycrystalline) | Convert sunlight into electricity |
| Plywood board or plastic base | Base frame to mount the solar cells |
| Transparent acrylic or glass | Front cover to protect the cells |
| Soldering iron and solder | Connect solar cell tabs together |
| Bus wire and tabbing wire | Electrical connections between cells |
| Silicon adhesive or epoxy | Attach cells to the panel base |
| Diode (optional) | Prevent reverse current flow |
| Junction box and output wires | Channel power from panel to devices |
| Multimeter | Measure voltage and current |
These items can be found online or in local hardware and electronics stores. Pre-tabbed solar cells simplify the process by reducing the amount of soldering required.

Ready to take the next step? Discover how solar energy can elevate your home and reduce those energy bills. Request a Free Solar Estimate at NEW SOLAR QUOTE
Step by step: How to make a solar panel
Step 1: Prepare the panel base
Use a wooden or plastic sheet as the backing. Cut it to the size needed to fit the number of solar cells you plan to connect. Sand and clean the surface to ensure a smooth base.
Step 2: Lay out the solar cells
Arrange your solar cells in rows and columns. A common setup for beginners is 36 cells wired in series to generate about 18 volts, which is sufficient for charging a 12V battery. Be careful—solar cells are fragile.
Step 3: Connect the solar cells
Using tabbing wire and a soldering iron, connect the front (negative) of one cell to the back (positive) of the next. Continue this process in a zigzag pattern to maintain polarity. For safety, wear protective eyewear and use a fume extractor or work in a well-ventilated space.
Step 4: Attach cells to the panel base
Once connected, use silicone adhesive to glue the cells onto the board. Allow the glue to dry fully before moving to the next step.
Step 5: Wire the strings together
If you are using multiple strings of cells, solder them together and bring the final positive and negative leads to a central junction box. Install a diode in the positive line if you plan to connect the panel to a battery—this prevents the battery from discharging at night.
Step 6: Install the protective cover
Place a clear acrylic or tempered glass sheet over the cells to protect them from dust and weather. Seal the edges with silicone to make it water-resistant.
Step 7: Test your panel
Use a multimeter to test the output voltage and current in direct sunlight. A 36-cell panel should produce about 18–20 volts under ideal conditions.
Common setups and expected output
| Number of Cells | Output Voltage | Use Case |
|---|---|---|
| 18 cells | ~9V | Educational kits, USB power |
| 36 cells | ~18V | 12V battery charging, lighting |
| 72 cells | ~36V | Larger battery banks, inverters |
For example, a 36-cell panel with 3.5 amps of current could generate 60+ watts, enough to charge small devices or power LED lights.
Safety precautions
-
Always work in a dry area and avoid contact with water when wiring cells.
-
Use insulated tools to prevent short circuits.
-
Solar cells can be fragile—handle them carefully to avoid cracks or damage.
-
If mounting the panel outside, ensure it’s securely fixed to resist wind and rain.
How to use your homemade solar panel
Your DIY solar panel can be used in a variety of off-grid applications:
-
Charge a 12V battery: Pair your panel with a charge controller to safely charge a deep-cycle battery for storing energy.
-
Power LED lights or fans: Use an inverter to convert DC to AC if needed.
-
Educational projects: Ideal for science fairs or classroom demonstrations.
-
Emergency backup: Useful during blackouts for charging phones or radios.
Improving efficiency and scaling up
If your goal is more than just a DIY learning experience, consider the following upgrades:
-
Use high-efficiency monocrystalline cells for more power in less space.
-
Add a charge controller and battery bank to store and regulate energy.
-
Install an inverter if you need to run standard 120V appliances.
-
Use an MPPT controller to optimize power output under varying sunlight conditions.
FAQs
1. Is it cheaper to build a solar panel than buy one?
Building one may be cheaper for small projects, but commercial panels are more efficient, reliable, and durable for larger or long-term installations.
2. Can I use broken solar cells?
Yes, but they produce less power and may not be as stable. They’re often used for educational kits or small crafts.
3. How long do homemade panels last?
Typically 2–5 years with proper care, much shorter than commercial panels which can last 25 years.
4. Do I need a charge controller?
Yes, especially if connecting to a battery. It prevents overcharging and extends battery life.
5. Can I make a flexible or foldable solar panel at home?
That requires special materials and equipment. DIY flexible panels are possible but complex and less efficient.
Closing Thoughts
Learning how to make a solar panel is both educational and empowering. It gives insight into renewable energy, basic electronics, and sustainable living. While homemade panels are not meant to replace commercial-grade systems, they are great for small energy needs, experiments, or off-grid applications. With time, practice, and a few upgrades, you can expand your solar DIY projects to serve a variety of everyday functions.
Switch to solar and start saving now! Don’t miss out on a cleaner, cost-effective energy solution. Schedule Your Free Consultation at NewSolar QuotesDiscover more ways to save with solar! Visit New Solar Quote and see the potential for your home.